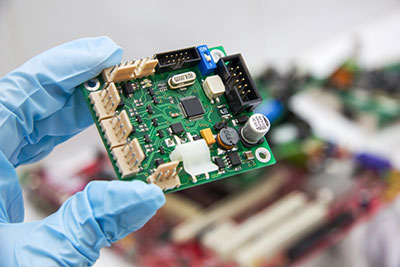
In today's increasingly electrified world, the humble cable assembly has become a mission-critical component. From autonomous vehicles to life-saving medical devices, a single faulty connection can lead to catastrophic failure. But what truly separates a reliable, long-lasting assembly from one destined for an early grave? The answer lies not just in the design, but in a meticulously controlled manufacturing process. This guide will walk you through each critical step of the manufacturing journey, providing the insights you need to make informed decisions for your projects.
Contents
- What is a Cable Assembly?
- Why does the Manufacturing Process Matter?
- Cable Assembly Manufacturing Process: Step-By-Step
- 1. Design & Engineering
- 2. Material Selection
- 3. Cable Preparation
- 4. Layout, Routing & Bundling
- 5. Connector Termination
- 6. Overmolding & Strain Relief
- 7. Electrical & Functional Testing
- 8. Final Inspection
- 9. Labeling & Traceability
- 10. Packaging & Delivery
- Standards & Best Practices
- Beyond the Standards: The OurPCB Difference
- Conclusion: Process is the Bedrock of Performance
- Cable Assembly Manufacturing Process Guide FAQs
- What information should I provide a manufacturer before starting cable assembly production?
- What causes cable assembly failures in real-world applications?
- Can cable assemblies be customized for low-volume or prototype projects?
- How does cable assembly design affect total system cost?
What is a Cable Assembly?
A cable assembly is a finished product made by combining raw wires or cables with connectors, shielding, jackets, labels, and protective elements so that it can reliably transmit electrical power and signals within a system.
This is not to be confused with loose wires, as cable assemblies are designed, cut, terminated, and tested to meet specific functional, mechanical, and environmental requirements.
Why does the Manufacturing Process Matter?
The importance of the manufacturing process cannot be overstated. Cable assembly is highly labor-intensive, with labor accounting for 30–50% of total harness cost, making process efficiency a primary cost driver. Industry analysis shows that automation and optimized workflows can reduce labor effort by up to 50%, directly lowering unit cost, scrap, and rework while improving consistency and reliability.
Special Offer: Get $100 off your order!
Email [email protected] to get started!
Cable Assembly Manufacturing Process: Step-By-Step

Here’s the typical process most high-quality manufacturers, including here at OurPCB, follow to produce custom cable assemblies:
1. Design & Engineering
The cable assembly process begins with detailed design and engineering. Project engineers define:
- Functional requirements (signal types, power ratings)
- Connector types and mating requirements
- Wire gauge and insulation specifications
- Mechanical routing and bundle geometry
These parameters are translated into clear schematics, assembly drawings, and a bill of materials (BOM) that guide all subsequent manufacturing steps.
2. Material Selection
Next, the right materials are chosen based on electrical, mechanical, and environmental needs:
- Conductors: Copper is common for its conductivity; sometimes tinned or plated for corrosion resistance
- Insulation: PVC, PTFE (Teflon), XLPE, or silicone depending on temperature and flexibility requirements
- Shielding: Foil and/or braided shields to control electromagnetic interference (EMI)
- Jackets & Protective Sleeving: TPU, PUR, or other jackets based on durability needs
Proper material selection ensures the finished cable assembly performs reliably in its intended operating environment.
3. Cable Preparation
Once materials are chosen, each wire or cable is prepared:
- Cut to precise lengths using programmable cutters
- Insulation stripped at each end to expose conductors
- Labels or markers applied for tracking and routing
Accurate preparation ensures consistent termination quality and reduces assembly errors.
4. Layout, Routing & Bundling
Technicians lay out all components on assembly boards according to the design:
- Wires are routed to the correct layout pattern
- Branches or breakout points are positioned
- Bundles are formed using cable ties or lacing tape
- Spacing and breakout placement are confirmed
This step ensures the harness will fit the final installation and meet geometrical requirements.
5. Connector Termination
Connectors are fitted using the appropriate method:
- Crimping: A fast, consistent, and industry-standard method used in most assemblies
- Soldering: Used where higher reliability is required (e.g., medical, aerospace)
- Insertion: Terminals placed into the connector housing
Each termination is performed using calibrated tooling in conformance with standards like IPC/WHMA-A-620. Key process controls like crimp height verification and pull-force testing are essential to ensure mechanical retention and flawless electrical performance.
6. Overmolding & Strain Relief
For assemblies requiring extra protection, overmolding might be applied. Overmolding:
- Seals the junction between cable and connector
- Provides strain relief to reduce stress under mechanical loads
- Enhances environmental protection (moisture, vibration, abrasion)
This step is especially common in rugged or outdoor applications.
7. Electrical & Functional Testing
Every assembly undergoes rigorous testing:
- Continuity Tests: Verify that each conductor successfully connects per schematic
- Resistance & Insulation Tests: Ensure proper electrical performance
- Hipot or Dielectric Tests: Validate insulation strength at elevated voltages
- Signal & Impedance Tests: For data or high-frequency cables
Testing ensures that assemblies perform as designed and meet customer and regulatory specifications.
8. Final Inspection
Before packaging, inspectors perform:
- Visual inspection for crimp quality, insulation integrity, and correct assembly
- Dimensional checks using gauges and criteria from standards
- Documentation verification for traceability
This step supports quality assurance and long-term reliability.
9. Labeling & Traceability
After passing final inspection, each assembly is:
- Tagged with serialized identifiers
- Tagged with revision and part numbers
- Linked to test results and BOM records
Traceability is essential for regulated industries like medical, aerospace, and defense.
10. Packaging & Delivery
Finally, cable assemblies are carefully packaged based on handling class and destination:
- Anti-static bags or moisture barrier packaging
- Foam trays or protective separators for fragile connections
- Barcodes and documentation included for inventory tracking
Proper packaging protects assemblies during shipping and storage.
Standards & Best Practices
Top manufacturers follow industry accepted standards such as:
- IPC/WHMA-A-620: Workmanship and acceptance for cable assemblies
- UL, CSA: Safety and flame-resistance standards
- RoHS, REACH: Environmental compliance for materials
Following these standards is not merely about compliance; it's about a commitment to quality.
Beyond the Standards: The OurPCB Difference
Following a disciplined process is the foundation of quality, but true excellence comes from integrating that process with engineering expertise and a customer-centric approach. At OurPCB, our approach stands out because we combine:
- Engineering design support: We partner with you from concept through production to optimize for manufacturability and performance
- Integrated Services: Simplify your supply chain by combining PCB and cable assembly manufacturing with a single, trusted supplier
- An Uncompromising Commitment to Quality: We enforce IPC/WHMA-A-620 workmanship standards on every build, without exception
- Flexible, Scalable Production: Our processes are designed to deliver consistent quality, whether for a handful of prototypes or high-volume production runs
Conclusion: Process is the Bedrock of Performance
As this guide illustrates, the journey from a schematic to a finished cable assembly is a complex interplay of engineering, material science, and process discipline. Each step is a critical link in a chain that determines the final product's reliability and longevity.Ultimately, choosing a manufacturing partner is about choosing their process. A partner dedicated to excellence at every stage provides more than just a component; they provide peace of mind.If you are looking to bring this level of manufacturing discipline to your next project, the engineering team at OurPCB is ready to help.
Contact OurPCB today for a quote or engineering consultation
Cable Assembly Manufacturing Process Guide FAQs
What information should I provide a manufacturer before starting cable assembly production?
To ensure an accurate and fast quote, it's best to provide a complete package: drawings, electrical schematics, a Bill of Materials (BOM) with specific connector part numbers, and any performance requirements (e.g., voltage, temperature). Providing environmental and compliance needs early on is crucial to avoid redesigns.
What causes cable assembly failures in real-world applications?
In our experience, the most common causes are process-related: poor crimping, inadequate strain relief that leads to fatigue, incorrect material selection for the operating environment, or insufficient testing. This is why strict process control and 100% validation are non-negotiable for reliable assemblies.
Can cable assemblies be customized for low-volume or prototype projects?
Yes, most manufacturers support prototype and low-volume builds using the same controlled processes as production. Early prototypes are often used to validate fit, performance, and manufacturability.
How does cable assembly design affect total system cost?
Design choices influence labor time, material usage, and assembly complexity. Simplified routing and standardized components can significantly reduce manufacturing and lifecycle costs.
Back to Top: Cable Assembly Manufacturing Process Guide (2026)
Special Offer: Get $100 off your order!
Email [email protected] to get started!